Walkthrough for The Witcher 3: Wild Hunt, following our recommended Game Progress Route. The game is divided into a prologue and 3 acts. The main quest progresses through the act and certain side quests become available as this progression happens. Other side quests and contracts are independent of the act so are listed separately. Please see Maps for a list of maps available.
The Witcher 3 Walkthrough Helpful Links
- New Player Help: Learn the basic mechanics.
- Endings: Overview of the possible endings of The Witcher 3
- Sex & Romance: Potential Romances in the game
- Locations Overview: An overview of the locations you can explore.
- Creatures and Monsters: List of enemies that you can encounter.
- NPCs: A list of NPCs that you can encounter.
- Quests: The list of quests that have a more detailed walkthrough
The Witcher 3 Walkthrough Guide
White Orchard (Prologue)
The Witcher 3 Walkthrough - Prologue Points of interest
- Kaer Morhen (Quest).
- Lilac and the Gooseberries.
- The Beast of White Orchard.
- The Incident at White Orchard.
- Imperial Audience.
Kaer Morhen (Quest)
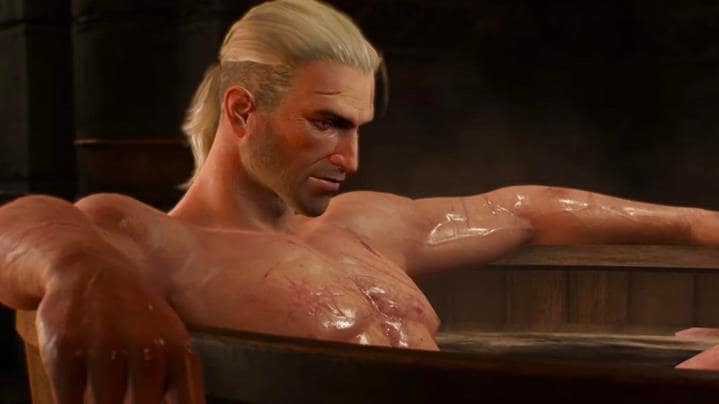
After the cutscene, you'll first find yourself in a bedroom inside a stronghold of Kaer Morhen. The first thing you need to do is to locate the key to open the door so that you can exit the area. The game will first have you activate your Witcher Sense mode. With this feature, you'll see that important item are marked red, while lootable items are marked orange. While activated, you'll be able to sense the clothes in the bed, a container of Jewelry by the bookshelf, juice on the table, perfume on another shelf by the door, and lastly the key to the door. After exiting the room, you'll have a few conversations and you'll be allowed to start a quick tutorial regarding movement mechanics in the game. Upon reaching the objective marker, a scene will play out giving you the option to do a basic tutorial or skip. Once you're done with the tutorial or skipped the tutorial, a scene will play out ending the tutorial.
Lilac and the Gooseberries
The Quest will begin with a dialogue with Vesemir and as soon as your small chat concludes, you'll be ambushed by a group of ghouls. Fortunately, only one or two Ghouls will attack you at a time as there are a total of five that you must defeat. Use this battle to hone your dodge/roll maneuvers, and strike them when you spot a gap. After the battle, go a short distance to the west along the road and use your Witcher Sense to easily find the Crystal Skull quest item hidden in the bushes immediately to the right of the road. As soon as you're prepared to move, ride your nearby horse and follow Vesemir. As you go, you should open the quick travel markers for the Crossroads and Ransacked Village. There will eventually be a scene. Afterward, ride into the town ahead. For a scene that will continue the quest, you can approach the tavern in this area. The game will offer you a brief instructions on dialogue options during this dialogue and will also exhort you to utilize the store icon. You will also receive a brief introduction to using shops in the game from this. When you regain control of Geralt, we'll now need to play with our conversation skills. Speak with the peasants, The Scholars, and Gaunter O'Dim. We can leave the pub now that we have a new Quest. A short scene will play and you'll be attacked by the ruffians we bumped into earlier. You'll need to fight the pair of remaining thugs in with your fists. Keep your guard up and use your follow-up attacks to knock them down with your counters. We now have to travel to the northern Nilfgaardian outpost. When you arrive at the garrison, chat with the guards before entering the gate. Make your way over to the tower nearby to speak with their leader.
The Beast of White Orchard
This quest contains two parts, you'll need to speak with a Herbalist and a Hunter. Talk to the Herbalist first since she is closer. Ask the herbalist where to find Buckthorn by entering her hut. She will direct you where to search, and your map will be marked with a new objective. Within the search area, dive underwater and use your Witcher Sense to find the lootable plants down here. Geralt will be able to get the necessary Buckthorn by plundering the plants.
Now, you'll find out that the hunter's home is empty. Use your Witcher Sense to search for a set of footprints on the road in front of the home. Follow the prints and talk to the hunter. After a quick talk, agree to help him with his situation. Follow him until you come across the pack of stray dogs. There are four dogs in the pack and as they act in similar ways to several other enemy types you'll encounter later in the game, you should be able to get some practice in on dodging their leaps and lunges. Once all four have died, approach the hunter and start a conversation. Just follow the hunter afterward and once you reach the site of interest, activate Witcher sense and scan the area. You'll be able to scan Bloodstains, a campfire, bottles, and footprints. Follow the footprints towards the south to a broken bridge. Head to the other side of the broken bridge and activate your witcher sense to follow the trail to the left. Climb the ledge and make your way to the top of the hill until you reach the Griffins nest. Once you arrive, scan the area and you'll discover the Corpse and bines of the Griffin, The griffins nest, and a griffins body. Before leaving, loot the soldier nearby for a better sword that you can use. Now, return to the tavern and speak with your accomplice. Tell him you will accept the Griffin contract and your objectives will start to update. Afterward, ride your horse and meet your buddy in the field. A cutscene will play out where you are handed a crossbow, and after the scene is when you'll be able to use it. This is also when you will encounter your first boss fight with the Griffin. After decreasing the health of the griffin, a cutscene will play. Following the conversation, loot the corpse and make your way back to the Nilfgaardian Garrison to turn in the quest.
The Incident at White Orchard
After finishing your duties at the White Orchard, return to the Tavern at the main Settlement and speak with your buddy. A scene will play out and no matter what choice you make during the conversations, a group of 5 thugs will come in to attack you.These are surprisingly easy opponents to deal with if you managed to get used to the combat mechanics already of Witcher 3. After defeating them, another cutscene will play out.
Imperial Audience
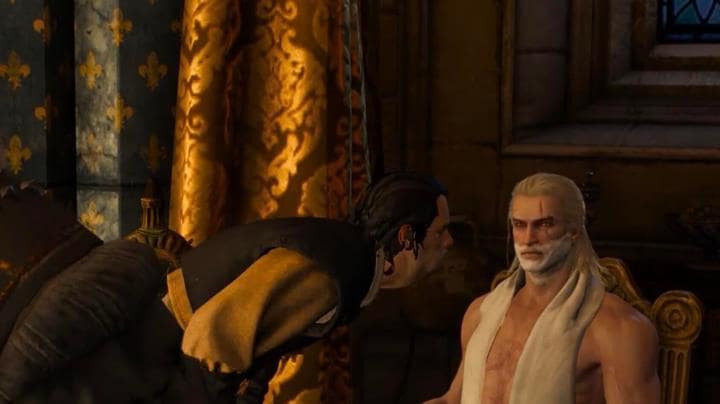
After the scene where you escape from White Orchard, Your character Geralt, will find himself in Vizima City. After a brief interaction, a man will approach you to ask some questions. The man questioning you will ask about the choices you made and the events that happened during WItcher 2: Assassins of Kings. These series of questions will set the state that your world is in. The questions include:
- Did you Kill Aryan or Spare his life during the siege?
- Did you Kill Aryan or Spare his life during the siege?
- Did you save Triss or help Iorveth/Vernon Roche?
- Did you warn Sile or let her die?
- Did you kill Letho, or let him live?
After the questions, you;ll need to listen to the Chamberlain and follow the instructions given. Choose your set of clothes and later equip a set of boots, shirt, and pants from your inventory. Afterwards, speak with the chamberlain again and practice a bit of bowing. Follow him afterwards towards the hallway where you'll need to decide the following:
- Bow to the Emperor
- Not bow to the Emperor
None of the choices you make will affect anything in the story. After this encounter, you'll meet Yennefer who will inform you about things and will update your current objectives. After the scene with Yennefer, you'll need to leave the area and speak with the Ambassador Var Attre who will share to you the backstory of what is currently happening with the Grander Scheme of things in the world. Retrieve your belongings once you are ready. Follow the Quest marker and use fast travel to leave the city and make your way to Hang Man's Tree in Velen to complete the quest.
Velen (Act I)
The Witcher 3 Walkthrough - Act 1 Points of interest
- The Nilfgaardian Connection.
- Bloody Baron.
- Ciri's Story The King of the Wolves.
- Family Matters.
- A Princess in Distress.
- Hunting a Witch.
- Wandering in the Dark.
- Ladies of the Wood.
- The Whispering Hillock.
- Ciri's Story Fleeing the Bog.
The Nilfgaardian Connection
After officially arriving in Velen, take a look at your map to see how big the map really is. You'll see that there's a new objective marker, which you need to head to. Once you arrive, enter the inn to speak with the innkeeper which will trigger a cutscene afterwards. You'll be given 3 choices which can impact the next quest. The choices are:
- Back off or Die - This will cause a fight between you and the guards which will lead you to killing them. At the next mission, you wont be able to enter through the main entrances and will have to find another way inside.
- I'm a Witcher - This will make the guards settle down and will allow you to enter the area in the next mission for a fee.
- Care for a drink? - You'll be able to enter Crow's Perch freely and free of charge.
After the choices, the innkeeper will talk to you again, and this will update your objectives. Take a ride over to Heatherton's new objective marker. When you get there, you'll see an NPC attempting to control three stray dogs. You'll have to kill the dogs to assist him. This is going to start a conversation once they are deceased. After the conversation, go to the hut nearby while activating Witcher Sense. You'll be able to scan the following:
- Body
- Rug
- Torch
- Book
Scanning the 4 items will complete the quest which unlocks Bloody Baron and and Hunting a Witch Quests.
Bloody Baron
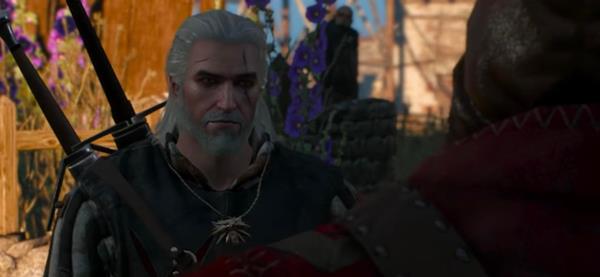
We must travel to Crow's Perch and see the baron there in order to complete this task. Use the bridge to enter the settlement once you've reached Crow's Perch. If you like, take a look around before making your way through the first gate and up the hill to the main gate of the keep in the east. The guards on the other side of the closed gate will engage you in conversation after you arrive there, and their response will depend on what you told the bandits during the previous encounter. The results of your choices:
- Back off or Die – The guards will not let you in at all and you'll need to find an alternate route.
- I'm a Witcher – The guards will allow you into the keep area for 15 Crowns.
- Care for a Drink? – The guards will allow you into the keep.
Depending on the choices you made previously, here are the routes you can take if you were allowed entry or denied entry. If chose the last 2 dialogues, the guard will guide you in until you reach the Baron. At this point, speak with him and after the conversation, the mission will be complete. Once done, head to the next quest which is Ciri's Story The King of the Wolves.
Ciri's Story The King of the Wolves
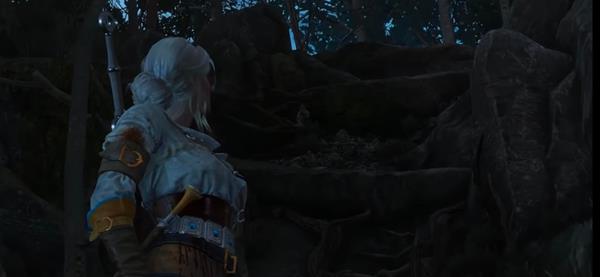
After recovering, you'll be taking control of Ciri. This is the first of several quick side missions you'll do in her place. Her mechanics are bit different compared to Geralt. As a result, unlike Geralt, she is unable to use the inventory, magical signs, or Witcher Sense. She can, however, restore health automatically, which is really useful! Similar to Geralt, Ciri can use swift and heavy attacks as well as dodge and roll maneuvers to escape harm. She will eventually gain other abilities, but for now, we are limited to the normal ones. Move forward and kill the three Wolves in front of you to start her segment. Utilize the battle to get used to her dodges and rolls, which have a little greater range than Geralt's. A cut-scene will begin when you kill them. We must immediately follow the young girl. She will guide us across a rather straight section of marsh, where we will soon have to stop and repel a pack of six wolves. Due to the enormous number, you should try to keep track of where each one is at all times, be ready to employ hit-and-run tactics, and be prepared to roll pretty much continually until the numbers start to decline a little and you can start concentrating on specific people.
After the fight, we'll see another cutscene as Ciri examines a body, considers all of her options, and ultimately decides to proceed by selecting the "Summing up." option. Continue to follow Gretka while keeping an eye on your mini-map. All of the herbs you come across on your travels should be looted. You will have to protect yourself from an additional five Wolves when we get at the following clearing. Look for a dead dog that Ciri can examine on the opposite side of the clearing from where we arrived once the area has been cleared. A cutscene will begin to play if you take the last of the nearby herbs. The kid will now lead you to a cave where you'll need to fight the King of Wolves, which is a boss fight. After the fight, a cutscene will play out again.
Family Matters
As soon as you finish Ciri's memory, you'll automatically be led to a discussion with the Baron. Just agree to assist him and you'll begin this quest automatically. Follow the baron up the stairs and investigate Anna's and Tamara's room. Activate your Witcher Sense in Anna's room and scan the following:
- Candlestock
- Flowers
- Vacant Spot
- Painting
- Closet
After scanning the closet, you'll next be able to scan important things like the following:
- Scratches
- Candlestock
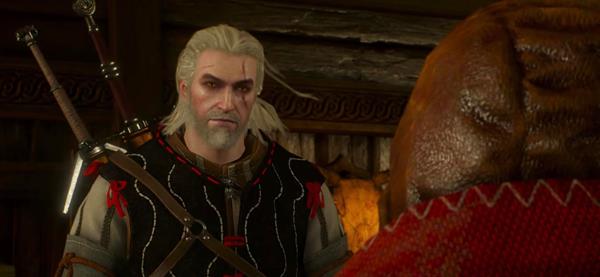
Once you've given the candlestick another look in Witcher Sense, a scent trail will emerge. This should be followed outside and down the first flight of steps. You can check a floor plank here to see if it contains a talisman. Retrace your steps and enter Tamara's room. As you enter Tamara's chamber, check the cabinet along the left wall for a rusted key and some incense. These items will also leave a scent trail in Witcher Sense mode that resembles the one we discovered leaving Anna's room. While we're here, we can use your Witcher Sense to look about. Scan the doll in the room. Let's follow the scent trail in Witcher Sense all the way down to the basement as there is nothing left up here at this point. It will take you to a locked door from here. To open it, use the rusty key we discovered in Tamara's room.
Now, head over to the Pellar's Hut and you will see it under attack by the Baron's men. Apprach the scene and this will spark a conversation with the henchmen. Here are your options when it comes to talking to them:
- Bribe them to leave
- Use AXII to calm them down(Level 2)
- Leave or Die
- What do you want?
If in case your choice leads to a fight, we highly suggest you take out the ranged enemy first, so that you can deal with the melee enemies without having to worry about taking damage from afar. Whichever the outcome is, open the door to chat with the pellar, and this will unlock a new quest called A Princess in Distress.
A Princess in Distress
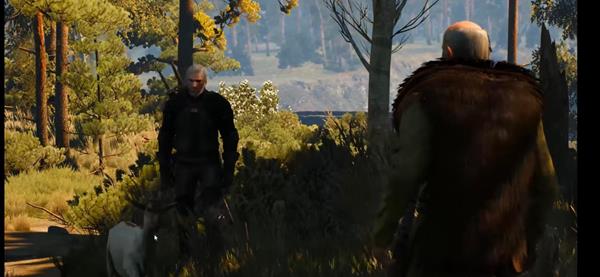
Head to the left side of the Pellar's house and activate Witcher Sense. You'll be able to scan footprints leading away from the Hut. Follow the footprints until you reach the Pellar's goat. Upon reaching the goat, use the Pellar's Bell to get the goat to come to you. Then eventually, making your way back to the Pellar's Hut. Do take note that the goat will disturb some Bears on the way so be prepared to fight some bears on the way.
The bears in the game have a lot of armor and must take a lot of hits before they are killed. They like lunging and swiping attacks, which can be avoided by rolling or evading when the opportunity arises. By setting the bear on fire with IGNI, you can temporarily stun it, and by tanking it with QUEN turned on, you can deal a ton of damage for a short while. Bear strikes can be quite destructive, so it's preferable to avoid them by dodging, attacking once, dodging, attacking again, and so on until the bear drops.
Hunting a Witch
We need to learn more about the witch before we can start this quest. To accomplish this, we must travel to Midcopse, a settlement southwest of Crow's Perch and south of Blackborough. A yellow search marker will show up as soon as you enter the town. In essence, we must gather all the information we can about the witch from this area. There are various methods for learning more about the witch. You can try Eavesdropping on a pair of women, Speak to the old man under the tree, or a woman speaking to herself about the witch. Choosing any of those options will give you the information that you need about the witch. The trail leading to the Witch's hut can now be found by simply following the updated objective markers. As you arrive to the location, a cutscene will play, then use your witcher sense to investigate the room of the hut. You'll find:
- Pots
- Candle
- Pentagram
- Stack of Books
- Ornament
- Skull
After you inspect the skull, you'll find a portal has summoned which will lead you to a new area. Climb up the ladder and enter the portal. Climb the stairs then once you reach the top, a cutscene will play out. You have the option to immediately teleport to the next area's entrance after the chat is through. If you don't want to do anything else at this time, then do that.
Wandering in the Dark
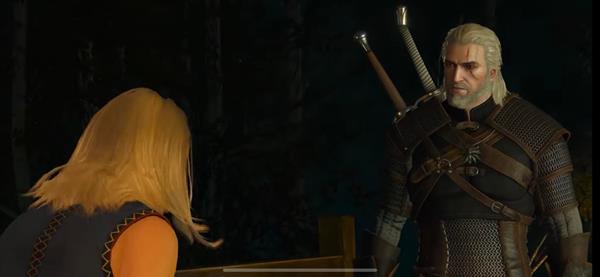
For this task, we'll be escorting Keira while we investigate some underground ruins, so you'd better get used to company! She can fight on her own by dealing some good damage to enemies so she can be very useful in a fight. We must first go into the ruins from here. A Cutscene will begin to play when you approach the bottom of the stairs. Keira will then build a port which you'll need to enter. You'll find yourself in a small, isolated cave with a pool of water and a group of three Drowner as soon as you step through the portal. To find a tunnel, enter the water and dive beneath this wall. Keep an eye out for a chest on the left as you swim through the tunnel; you can open it to obtain Diagram: Tracker's Trousers. At the end of the channel, come to the surface and ascend to the ground. The trail divides at this point, as you will see. The same open space can be reached from either direction, but the left-hand corridor can only be traveled in one direction, whereas the right-hand passage has a few weak walls we can break down with AARD and a fight with a Foglet. You can go back to where we earlier descended by using the right-hand path after the failed portal attempt. Try to eliminate the Drowner close to where you enter to avoid drawing too soon because this section might be challenging with many opponents nearby at once. A satisfying instant-barbecue effect may be obtained by luring foes into the swamp gas in this location and then blasting them with an IGNI blast. Climb the stairs on the area's southern side. You can now choose to travel left or straight to find Keira, or turn right to head back to the entrance. Heading straight will get you to your destination right away, but I advise going left and making your way down the corridors because there are multiple chests and lootables there. You will, however, have to contend with a Foglet along the way. You'll find Keira being attacked by Rats when you get there. In order to eliminate the two nests in the room, we essentially need to utilize a bomb or an IGNI.
After a little discussion, proceed along the hall and up the nearby stairs until a scene begins to play. To enter a huge, open room, exit through the door. Once more, there is a lot of swamp gas in this region that you should avoid, but you can also use IGNI to attack the four hiding Wraith in the area. You can even dodge the most of the Wraiths by leaving through the first opening that emerges from the sea on your right from where you entered. The left side of the room has a pool we can dive into to find a pair of chests containing Torn-out Page: Fiend Decoction and Torn-out Page: White Raffard's Decoction. We can also surface at the far end to find another chest, but looting this will spawn four more Wraiths, so be careful! The far end of the room has a long tunnel with a chest and a corpse at the end containing Diagram: Tracker Return to the section I previously indicated, and while in Witcher Sense, take notice of the SWALLOW picture on the wall. To proceed through the following area of the ruins, we must follow these symbols. To get to another man-made region, continue down the tunnel and ascend the ledges at the end.
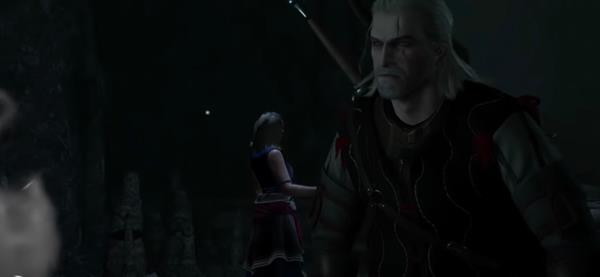
Come close to the hologram to trigger a cutscene. We must search for a horse emblem. There are several of these symbols on the walls in this area, but the one we need is on a wall in the middle of the space, just above the watery pool. When you reach the HORSE symbol, jump down and swim through the tunnel. After leaving and ascending the stairs, use Witcher Sense to search for another HORSE symbol. To create a passage in the previous region, inspect this. Continue down the passage and descend to meet up with Keira again. Now that the gateway is open, enter. Examine the SWALLOW sign to the left of the wall-drawn arch by turning on your Witcher Sense. Enter the portal after it has opened. When you ascend into the next area, you'll engage in a boss battle against a Golem, so you'll want to take this opportunity to meditate and recover your health. Once you defeat the Golem boss, climb a ledge where the Golem was guarding. On the left side of this tunnel are two entrances. We need to go through the first left door, which has a SWALLOW symbol above it, but you can also go through the second door on the left for a fight with a gargoyle and a chest. When you're prepared, enter through the SWALLOW-marked door. A similar portal to the one we previously utilized is located here; to use it, activate the SWALLOW symbol on the wall next to it. Walk through the path through all of the frozen Golems and exit into the room at the end for a cutscene. During the cutscene, Keira will a bubble shield stable. Until the part is over, traveling outside the bubble will cause Geralt to take damage. This is shielding you from the elements that the enemy unleashed. You will need to follow Keira as she moves around the space to shut off each of the room's three portals. You will need to protect her as she approaches each portal from a pack of five Hounds of the Wild Hunt that will materialize there. These Hounds behave similarly to the Wolves or Dogs we've previously encountered, so dealing with them should be simple. Just wait for them to approach, then take them out inside the bubble or right outside it. After the final portal has been closed, a cutscene will play. You'll need to choose from a quick set of dialogues which have little impact. You can choose from:
- Don't faint on me (Possible romance with Keira)
- If you can't go on... (Not interested in romance)
The ejected Hounds and the remainder of the room's containers can be looted once you recover control of Geralt. Take Keira through the door at the top of the stairs when you're ready to go. Instead of going down the next flight of stairs after going down the first, use Witcher Sense to see if you can make out a weak wall ahead. Use IGNI or AARD to blow this down, and then blow the gas out of the adjacent room. Approach the treasure in this room by ascending the ledge at the end. This will summon a Foglet, so dispatch it swiftly before rummaging through the chest for Torn-Out Page: Chort Decoction and a variety of crafting supplies. Go back to Keira and descend the stairs, then enter the area below for the boss battle with Nithral.
After defeating Nithral, move to the back of the room and climb up the ledge to find a lab. Approach the hologram for another scene during this and the ensuing conversation you'll receive the Book: The Ladies of the Swamp from Keira. When you are able, loot the lab here for a bunch of crafting reagents, Formula: Manuscript Page: Draconid Oil and Diagram: Hunter's Boots. Now we'll need to find an exit. Activate your Witcher Sense to explore the area. You'll be able to scan the following:
- Loose Pages
- Document
- Potion
- Herbs
- Outline of a door in the archway
By looking at the archway, you'll start a new cutscene and be given the Eye of Nehaleni, a talisman that will let you see beyond illusions. This wall's outline can be used to open a passageway. Continue on for a discussion. You should now offer to assist Keira in completing the quick side quest "Magic Lamp," which will just take a few minutes and may be started right away. The mission will also be finished with this scenario.
Ladies of the Wood
You will receive the book "Ladies of the Wood" from Keira after finishing the "Wandering in the Dark" quest. To start the quest and update your quest marker, just go to your inventory and read the book. Just southwest of Lindenvale and southwest of Downwarren, the task marker will appear. Dismount at the goal marker, turn on Witcher Sense, and look at the unsettling statue of the woman to the left of the walkway. Keep Witcher Sense activated as you travel forward along the predetermined path while paying attention for the glowing red sweets that are hanging in front of you. You'll arrive in a clearing with three buildings after a short distance. For a scenario, approach them. Follow the objective marker into the house after the chat to try and speak with the child there. That doesn't seem to be going to happen, at least not until we can entice the woman away. There are two ways to do this. First, you must walk outside and chat with one of the kids. During the conversation, you can either play hide-and-seek with the kids or choose the "Anything else you want? ” choice and Geralt with give them food. Choosing to play Hide n Seek, you'll find the children at:
- Behind the tall building in some bushes.
- Behind the tall building in a haystack.
- Inside the western building.
- Behind the hut where the boy we want to speak with is located.
Whichever option you select, a cutcene will play, and you can then go inside the hut and talk to the boy. The location of our next goal is revealed here. Leave the hut and proceed to the new goal marker. Kill the Drowners and Water Hag you come across. Once it's safe to proceed, use Witcher Sense to find a set of footprints in the northern part of the search area. We must now travel a little distance into the swamp while following these footprints. However, be on the lookout because as you move across the area, a group or two of Drowners will attack you. The small burrow that the tracks lead to can be interacted with after you get there to start a cutscene. Right now, we have to follow Johnny. As he guides us through the marsh, we'll soon have to stop and defend ourselves against a squad of three to four Drowners. After dealing with them, we'll move on to the next little scene after moving a bit further. Now that our goals have been updated, we must get to the marker on the raised area above. To get there, use the slope and gap in front of the small waterfall. When you get there, you'll have to take out a Wyvern and three Harpies as foes. After eliminating the adversaries, take all you can from the Wyvern nest nearby before going back to Johnny below. Now we must pursue Johnny one more. He'll take us back to Garn's house via the marsh. A Water Hag and three Drowners are among the adversaries you'll have to fend off along the way. We'll move on and continue traveling until another brief scenario is presented to us after they have been dealt with. When you go there and spot the werewolf, you'll know you're at the proper place. Take him out, but be careful—he can deal a lot of damage and has the power to restore health. In order to keep him from regenerating too quickly, you'll need to continuously hitting the attack button.
Find the ledge we can ascend to beneath the tree once the werewolf has been vanquished. To proceed, enter the cave beneath the tree by interacting with the Place of Power immediately to your right. Enter the water there and walk around until you reach the very end. For a cutscene, emerge from the water on the opposite side and advance a little distance. This will unlock the quest "The Whispering Hillock", which is required to be done first before completing the remainder of Ladies of the Wood.
If by any chance you do finish The Whispering Hillock, the Ealdorman and a few other villagers will be waiting for you when you leave the tree after choosing your choice. Talk to him to get the cutscene. We'll return to the homes in Crookback Bog by the time the cutscene is over. The mission will be finished during the subsequent dialogue, which will allow us to play through another recollection of Ciri.
The Whispering Hillock
Upon finding the spirit in the Heart of the tree in Ladies of the Wood quest, you'll be given a pair of choices:
- I will help you
- I don't believe you
Choosing the first option will start the Whispering Hillock main quest, but choosing the latter will trigger a boss fight. If you do choose to help the spirit, this will require you to track down some items to complete the quest. These are easy items to find which are:
- Raven feather
- Spirit's Bones
- Wild Horse
Once you find and bring back the items to the spirit, a cutscene with conversations will begin. During the cutscene, you'll be helping the spirit but towards the end, you have the option of helping or killing the spirit. Once you complete the quest, you may proceed to the final part of Ladies of the Wood.
Ciri's Story Fleeing the Bog
We will be given control of Ciri in the midst of the swamp while she is being attacked by Drowners after a brief opening cutscene. You do not need to attack the enemies, so just proceed to the quest marker. This will trigger a cutscene then will end the memory.
Act 2
The Witcher 3 Walkthrough - Act 2 Points of interest
- Ugly Baby.
- Disturbance.
- The Final Trial.
- To Bait a Forktail.
- No Place Like Home.
- Va Fail, Elaine.
- The Isle of Mists.
- The Battle for Kaer Morhen.
- Blood on the Battlefield.
Ugly Baby
Go to Crow's Perch and talk to the Baron's Sergeant of the Guard when you're ready to move on. Once you have explained your purpose to him, he will grant you permission after a brief discussion. Step outside the keep and proceed to the stables. Inform the man outside how you intend to execute your plan, this will trigger a cutscene that will progress the story. You'll be given 2,000 Crowns and sent on your way after a quick stop in Vizima to speak with the Emperor once more. Eventually, you'll arrive in Kaer Morhen. Once you arrive at the Witcher stronghold, you will be given 3 updated quests which are related to the completion of the main story. These are:
The game will automatically set Disturbance as your next objective, so start there.
Disturbance
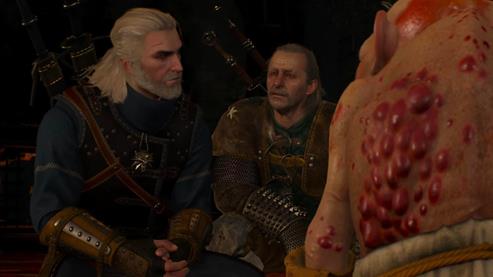
To start this quest, go to Kaer Morhen's main castle area. From there, navigate your way through the interior and upwards until you find Yennefer. To begin the quest, approach her where she is standing. You'll now have one Potestaquisitor in your possession after the talk. Don't forget to equip it in one of your quest item slots in the inventory menu. Follow your objective trail back to one of the sizable rooms we previously passed through by going back down the spiral staircase. There is a sizable yellow search area here. Pull out your Potestaquisitor, and use its noise indication to go to a sealed container that is close to the cage to Vesmir and Uma's left. Scan the box for a cutscene. The task will be completed after you return to Yennefer and inform her that everything is ready for another discussion and more plot specifics.
The Final Trial
You may locate Lambert at the sizable open space where we previously used the Potestaquisitor to locate the magical disturbance after finishing the Disturbance quest. Talk to him to start the next mission. When you're prepared, proceed to follow Lambert out of the keep, via a gap in the fortress walls, and down a dirt path until you come to a meadow where Harpies are attacking you. AXII will momentarily stun Harpies, but IGNI, the crossbow, and AARD will all knock them out of the air. Follow Lambert down the pathway and cliffs until you get to a Lakeside Hut. Following a short cutscene, you must move to a search area northwest of the Lakeside Hut. You will be attacked by Drowners as soon as you arrive. There are a total of five. After you deal with them, a Water hag will also appear that you need to get rid of. Afterwards, you'll now have access to the boat. Once you hop on, Lambert will drive the boat into the lake. After a few minutes of driving to the far side, you'll hear screams and will give you a set of dialogues:
- We should invesitigate
- Let's go to the cave
Either choice will still lead you to entering the cave, so if you want to investigate the screams, head west along the coast and speak to a kid you find there. You'll encounter a group of Foglets that will ambush you before you go to the cave. As soon as you enter the cave, you'll find some lootables, including a chest concealed beneath a flipped boat on the left side of the room. To climb up, approach the ledge behind the first area. Once you reach a vast cavern, continue exploring the cave a little bit more. You should be able to see a sleeping behemoth up ahead. The Old Speartip we've been hearing about ever since entering the cave is this exact one. At this point, you have the option of fighting him as an optional boss battle or climbing the ledges to the right to exit the cave.
Once the boss has been defeated, a short cutscene will play. Return to the place where we first entered it, and this time ascend the ledges to the right to locate a cave exit. Till another cutscene appears, proceed up the hill along the trail. You'll get to choose from the following during the conversation:
- Just want to get to the circle
- Let us Pass or regret it
Both choice will lead to the trolls attacking you. Run to the cave ahead to escape the rock slings. Utilize AARD on the rocks obstructing the cave's entrance, then ascend the ledge in the back to reach the exit. Move forward to the next scene. You have two rather apparent alternatives during this conversation: you can either confront the trolls or approach them nicely. Once you deal with the trolls, head on to the path until you reach the objective marker. Interact with the altar and then use IGNI and light 4 braziers in the area. A cutscene will appear that will end this quest
To Bait a Forktail
If you have just returned from "The Final Trial" with Lambert, you should be exactly where you need to be to begin this quest. It starts just outside Kaer Morhen's south gate. To find some tracks in the search area, use your Witcher Sense. The majority of this trail, which is somewhat extensive, will follow a path. You can pick up the route on the opposite bank of the river when you get there and continue on it. The tracks will turn off the path to the left just after the river. To find a statue with some loot, follow them up the hill. Upon moving up the hill, you'll encounter a horse that will update your objectives. Use your Witcher sense and scan the following:
- Campsite
- Footprints
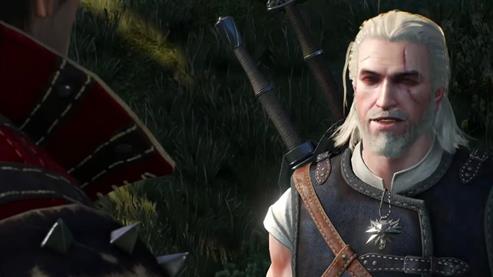
Once you get to the ground and continue following the footprints for a short way, they will vanish. Now study the neighboring tree with footprints around its base using Witcher Sense. When using Witcher Sense after looking at the tree, a scent trail will emerge. The following set of footprints can be found by following this up the hill. A cutscene will start playing if you find the goat at the end of the tracks. A Forktail will cut off the cobversation after a short while. If you manage to decrease the health of it until 40%, it will fly off. Get to the next area and scan the bloodstains on the ground. Just follow the trail until you reach a cave, You'll be fighting the Forktail again once you enter. After beating the Forktail, a few dialogues will be made and once done, return to the entrance of the cave. You'll be asked to race back to Kaer Morhen, which is a good opportunity since you do need to go back there. Once you reach the area, a cutscene will play to end the memory.
No Place Like Home
After completing the three previous quests, you'll need to hangout with the witchers for a while. Enter the main keep after entering Kaer Morhen. Approach the quest marker to trigger a cutscene in the spacious hall. The forthcoming conversation will require you to select a choice, which will determine your chance to have a romance option with Yennefer. Your choices comprise of:
- Sounds Great
- Don't get mad, but...
The first option will get you the romance scene with Yennefer. Afterwards, you'll find yourself with the other witchers and will have the dialogue options:
- Whats this about a salmina
- Let's have fun
- Play Gwent
- Time to go to sleep
Eskel will vanish if you choose both discussion options. Jump up and move toward the adjacent search area. To find some tracks in the search area, use your Witcher Sense. They will lead you around the big hall until you reach the large door that leads to the courtyard. Once more picking up the trail, continue on it until you locate Eskel. If you did not romance Yennefer earlier in this quest, you can choose during this dialogue to either try to locate some female company or to retire to sleep. You must opt to wear Yennefer's clothes if you decide to go on with your evening. After the event, take the items from the indicated nearby chest and equip them using the Key Items menu. This will start the quest-ending sequence.
Va Fail, Elaine
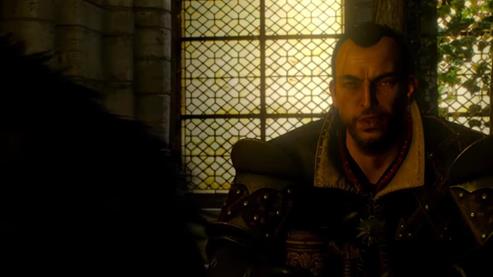
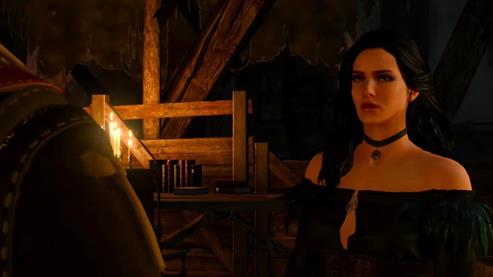
This quest starts immediately after No Place Like Home quest. You'll be given the Alchemy Formula The Decoctions of the grasses which needs to be brewed to continue. Once the few dialogues end, go to the search area to find a chest with the ingredients needed. Use the alchemy menu to create the needed alchemy and then return to Yennefer and give it to her. You must stir the three potions throughout the subsequent scenario. No matter what, the scene won't move forward until you've selected all three potions. There will then be one more conversation in which you must tell a tale. Since the result will be the same, either choice will do. You'll receive a Magic Firefly in the climactic climax, along with a suggestion of where we might go next. The quest will end in this scene.
The Isle of Mists
The Isle of Mists now serves as our primary plot quest. We'll know where to go from here, but we'll also need some partners to assist us carry out our strategy. The four additional primary quests serve as supplementary goals for the quest "The Isle of Mists." It is strongly advised that you finish them before going to the Isle of Mists because doing so will give you allies at Kaer Morhen, which will make it much easier for you to find some of the upcoming story sequences. They will also give you tons of XP, a number of achievements and trophies, as well as introduce you to a number of intriguing subplots that you might not have encountered otherwise.
- Brothers in Arms: Nilfgaard
- Brothers in Arms: Velen
- Brothers in Arms: Novigrad
- Brothers in Arms: Skellige
You will have saved a lot of time if you were consistent at completing side missions as you moved through some of the story. If you hurried to this point, you need to finish the side quests if you want to find the best allies for the following chapter. Before going to the Isle of Mists, the sub-quests will all be finished in the walkthrough that follows. It should be mentioned that if you intend to move quickly and reach the Isle of Mists, you will miss out on a lot of accomplishments and trophies and will fail a sizable number of side quests as soon as you set sail.
After you gather your allies for Kaer Modhen, or didn't, go ahead and proceed with this quest again. For this to trigger, go to Skellige Isles. We'll now need to board a vessel, and Kaer Trolde Harbour and Rannvaig both have convenient access piers. We'll be going to the southwest corner of the island of Undvik, which you may have visited before on the sidequest "The Lord of Undvik." To save time, you can take a boat from the settlement at Marlin Coast and travel quickly. Our destination is a hazy spot on the water near the base of a huge stone tower on the Undvik peninsula's northwest coast. First off, if you have never been here before, you will undoubtedly witness herds of echidnas flying around, ready to attack you as you approach. Exit the boat and dive into the ocean if they attack. To eliminate them and prevent damage to the boat, dive below and shoot them with your crossbow. t can be a little tough to approach Undvik from the north or east because the area around the island is full of small islands and rocks that lie barely below the surface, making it trickier to navigate than most places. Sail right in when you reach the hazy region. You will receive a warning about being unable to finish several side quests after entering the next location at this point, which is a point of no return.
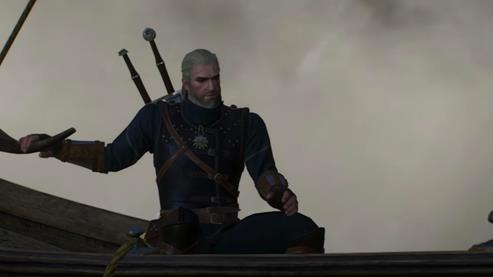
Geralt will let out a firefly throughout the cutscene. Once you regain control of the sail boat, you'll need to keep close track of it. As you maneuver around the numerous hazards strewn throughout the fog, make sure to accelerate and decelerate as necessary. There are a few Erynias along the road, but if you keep the boat moving quickly while they're around, you should be able to avoid them with little to no damage. The firefly will eventually guide you to a beach where you can exit. It will then direct us inland and to a cottage nearby, where we must follow it ashore. Keep an eye out for chests and other lootables along the sides of the path as you follow it, and be aware that Foglets will attack you at least once before you reach your target. When you enter the building, interact with the door. During the conversation, consent to aid the locals in finding their missing members. Head down the left-hand slope from the front door. Stop and eliminate the horde of Harpies above when you are attacked. Continue down the cliff face along the narrow trail, then cross the rock bridge. Up until you reach the coast, keep following the path. Retrace your steps from the path's base and move toward the yellow search area and the gurgling sounds to the west. Unfortunately, a pair of Bile Hags that we must destroy is making these noises. A stone pillar that we can approach for a scenario will be right there when you finish with them, which is a positive. After the action, we'll be returning along the coast to the east with the lighthouse in the distance as our destination. When you get there, go inside the lighthouse and take the chests out. To locate Gaspard, ascend the ladders all the way to the top of the lighthouse. converse with him. Once the talk is over, you'll be back on the ground. Now Gaspard must be escorted back to the hut. Gaspard will probably doze off along the way. As a result, keep an eye on him as you move and be sure to stop and talk to him if he appears to be taking a nap. Foglets will attack you on the way back to the hut, so be ready for them when they do! He'll arrive at the hut and go inside, leaving you to find the last dwarf. Go to the marker for the following goal to the west. Keep an eye on the mini-map as you move and try not to let them catch you off guard as you cross the island since Foglets will almost certainly assault you. The next area will consist of a fiend that you need to defeat. Use your Witcher Sense to find the body of the dwarf nearby after you've killed the Fiend. Take a look at this before returning to the hut. A cutscene will play as you draw near. The quest will end after a long discussion.
The Battle for Kaer Morhen
You must now accompany Yennefer and Triss across the castle grounds as we are back in Kaer Morhen. You'll be able to see and hear a little bit from each of the individuals you've gathered along the way as you move along. Check in on everyone as you go since there are some engaging conversations that you may listen to and participate in. The main keep and the objective marker within are our ultimate objectives. At this point, we'll start a cutscene or conversation in which everyone will assemble and Geralt will try to pep talk. You'll have to make two important decisions about how to use the lab and the workshop during his brief speech. Make sure you choose something you are comfortable with because we can only select one choice from each of the two parts of the keep we can use. Your decisions here will affect how the rest of the mission unfolds slightly.
Lab:
- Potions
- Traps
Workshop:
- Patch up the Wall
- Clear the Armoury
We won't have much time to move around and get ready after Geralt's speech. Make sure to put your new weapons and potions, if any, on, then use the nearby workbench and grindstone to hone your armor and swords. You can also chat with Ciri one last time while we are here. Go outside the door to start the fight when you are prepared to face the Wild Hunt. We'll start the fight invisibly outside Kaer Morhen. It's time to get to work after seeing a few fireworks. The three portals on the other side of the river are each identified on the map with an objective marker, and that is what we want to stop. You can then concentrate on eliminating the attackers around once the portal has been shut. The spike traps around the portal regions, which can't injure you but can harm foes if they make contact, will be there if Roche was recruited, so take note of this. Your objectives will change once all three portals have been shut.
Afterwards, you'll now be in control of Ciri. There's a dialogue selection with limited time which consist of:
- I must confront them
- I want to fight, too
With any decision, Ciri will also get a run on defense. She now has a new ability in addition to her existing powers, the blink/roll and the shadow strike, called charge strike, which, if kept down for a short period of time, can substitute her heavy attack. Kill the two dogs on the wall up ahead, then assist Triss in fending off several hounds and wild hunt warriors at the opposite end. To proceed, you must destroy all the enemies that are emitted from the two portals that will materialize at this location.
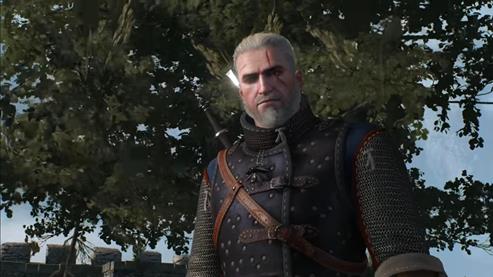
Now that you're back as Geralt, we start out riding a horse in this section. Maintain a sprint as you move along the predetermined route on the map. Make every effort to stay clear of the fireballs as you flee. When you get to the gate, enter, and Geralt will get off his horse. We must get to the lever to seal the gate in this first courtyard. Before ascending to Visemir's position, a vortex will appear and spit out a Warrior and a few Hounds. Deal with them first. Aid him in repelling the assailants on the wall. To locate Ermion, proceed to the wall's end. Before going right and pushing the lever on the wall to close the gate below, assist him in fending off some adversaries. Here, a scene will unfold that will change based on the people you have hired and the decisions you have made in the past with Lambert. We must now proceed to the inside courtyard. Before moving on to the next objective marker and dropping YRDEN or Dimeritium Bombs to close the portal, you need first take out any nearby Warriors and Hounds. For a quick cutscene, proceed to the designated gate. After that, descend the steps and turn to your right. A conflict will be taking place in the distance. Close the portal that appears as you make your way over here, taking out foes along the way. To swap back to Ciri, aid your teammates in repelling the foes in this area.
A squad of Wild Hunt Warriors will need to be defeated as soon as you regain control of Ciri. After eliminating them, proceed to the courtyard below while eliminating any Hounds that stand in your path. When you arrive, a doorway will open, calling out additional Warriors and Hounds. Kill them all before moving on to the huge wheel to the right of the doorway and engaging it to activate the gate.
There will be a lot of fighting in the next coming waves. In essence, Wild Hunt Warriors and Hounds are streaming in through portals everywhere, making it difficult to travel without getting involved in a conflict. We need to clean up the spaces to the right and left of the main keep door. You'll hear Triss yell for assistance at the gate after you've stopped the Wild Hunt's attacks. The quest will come to an end after you reach her.
Blood on the Battlefield
This quests automatically starts after The Battle for Kaer Morhen. This quest starts off with a long and emotional cutscene. After the cutscene, we'll need to visit the local elven sage and chat with him, but before you do, you can talk to each of the allies you've brought here for some more dialogue. Leave the area and follow the trail after talking to your allies to talk to Avallac'h and the sorceress.
Another cutscene will play out between Geralt and Ciri. It is at this moment that the endings can be changed. You'll have a series of timed choices to make, and for each one, you can aim for a positive or negative outcome.
First set of choices:
- Relax. You don't have to be good at everything - Leads to a bad ending
- Think I know what might lift your spirits - Leads to a positive ending
Second set of choices:
- Alright, Velen it is
- Gotta visit the emperor first
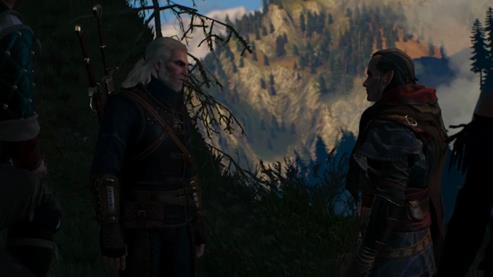
Afterwards, this will mark the end of the quest and will kickstart Act 3 with the Bald Mountain Quest.
Act 3
The Witcher 3 Walkthrough - Act 3 Points of interest
- Bald Mountain.
- Final Preparations.
- Blindingly Obvious.
- Payback.
- The Great Escape.
- It Takes Three to Tango.
- Through Time and Space.
- Battle Preparations.
- The Sunstone.
- Child of the Elder Blood.
- Skjalls Grave.
- Veni Vidi Vigo.
- On Thin Ice.
- Tedd Deireadh, The Final Age.
- Something Ends, Something Begins.
Bald Mountain
We'll need to follow Ciri as she guides you up a winding route and into a settlement on Bald Mountain once you've regained control of Geralt. A cutscene will start to play as you reach the village. If you want to learn more about the history and ask some questions, accept the invitation to sit by the fire. You are free to walk around the village after the chat or if you chose not to sit by the fire. Visit the blacksmith to have your gear fixed; there is also a merchant nearby who can offer assistance with inventory space issues. A weak door in the building across from the blacksmith can be blasted down with AARD to reveal a chest inside. When you're ready to move on, take the northern exit from the town. A cutscene involving Godlings will play, providing you with some further details regarding the present mission at hand. Continue down the trail until you come to another settlement with tents and a huge bonfire. If necessary, you can speak with another trader nearby for alchemy supplies. You must interact with Thecla, an NPC, inside the big tent marked by the goal if you want to advance with the mission. She will give you a mission to prove that Geralt is deserving of meeting the women if you make your case. After the event, make sure you are prepared with a crossbow before jumping into the sea below. Pull out your crossbow right away, go beneath the water, and shoot the Drowners swimming around in this area. To regain your breath, rise. Inhale deeply and descend into the tube under the water. At the end of the tunnel, if you use your Witcher Senses, you'll discover the Defiler's Oren. To the left is a chest that contains the items "Superior Thunderbolt for me" and "Axeman's Boots." Return through the tunnel and come back to the surface. Get out of the water, follow the GPS route up the cliffs, and when you get to the tents, go back and talk to Thecla again while holding the Defiler's Oren in your hand.
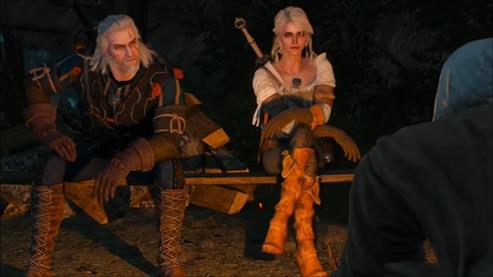
Marica will guide you to the trail up the mountain and open the gate for you if you exit the tent and follow her. You'll have to face up against Fugas inside. After a brief talk, Ciri will be under your power. Here, continue down the short walk until you come to a hole in the ground with a pool of water at the bottom. Jump in. Swim through the pool's exit tube and emerge onto the ledge at the other end. For a cutscene, continue a short distance down the tunnel. A cutscene will start to play once all three Crones have been beaten. Now that Geralt is under our hands once more. Follow the dirt route that leads to the right across the bridge. Look to your right when you get to the other side to locate a Place of Power that you should access. You better get ready since there is a tough boss battle coming up. If you need to replenish your potions or bombs at this point, it's a good idea to meditate before enhancing your weapon with Draconid Oil. Continue along the dirt road, scale the ledges, and move toward the campfire when you are feeling prepared. You'll be forced to defend yourself at the conclusion of the most challenging boss encounter to date as a conversation breaks out.
Once you have sufficiently damaged him, the fight will end with a cutscene. Be careful to mention that you want to stay around for a little while during the subsequent dialogue so that we can go loot Imlerith's remains. He is in control of a Magic Acorn. To escape the area, speak with Ciri. As you descend the slope, locals will come up to you. You have two options if you looted the Magic Acorn: you can give it to them, if you'd like, or you can wait and eat it for two skill points. You'll find yourself in Novigrad with some buddies after the last scene.
Final Preparations
This Act 3 main quest, which is composed of multiple side missions, is similar to In Ciri's Footsteps and Ugly Baby. The mission itself consists of a number of objectives to speak with several NPCs, including Triss, Yennefer, Ciri, and Avallac'h, each of which gives us a primary quest to complete. These are:
You can start with Blindingly Obvious quest since Triss is near.
Once "Blindingly Obvious," "Payback," and "The Great Escape" have been finished. Next time you visit the Rosemary and Thyme, go to the top floor to find Ciri, who will have the opportunity to talk with the sorceresses. It is possible to make decisions during the dialogue that can slightly alter how the game ends.
- Do not go to the meeting – this will slightly move towards a good ending.
- Go to the meeting – this will slightly move towards a bad ending.
After a brief chat and conclusion to the conversation, Ciri will leave. At this moment, Yennefer and Triss will appear and interact with us if you have romanced both of them up to this point. It Takes Three to Tango, a brief main quest, will begin as a result.
Blindingly Obvious
Just head upstairs and find Triss in one of the rooms. There will be a timed dialogue here so choose immediately:
- Calm down, it went well
- Sorry, shouldn't have
- We had to do it
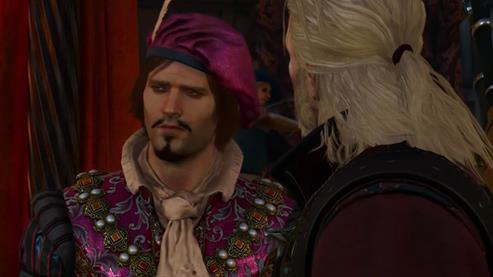
these choices won't have much effect, so feel free to choose your desired answer. After a while, you'll find out more about what they've been doing during your absence. You are given the choice to begin the quest right away or to meet Triss by the fountain at the Passiflora Brothel at the conclusion of the talk. Following a brief exchange at the fountain, Triss will direct you to Dijkstra's Bathhouse. You'll see when you get there that things have a little out of hand. Triss will remain here, thus it is up to us to enter and resolve the situation. As the three mind-controlled bodyguards approach you, enter the main area of the bath house and defend yourself. When they are finished, enter the door in the bathhouse's back and descend the ladder to the cellars. Move through the area and defeat a second pair of possessed bodyguards. If they both attack you at once, deal with the one with the shield last. In the cellars, keep going until you come to Dijkstra's pet Troll. When you speak with the Troll, you'll be given a choice between two alternatives that will somewhat change how the quest will go. Here are the choices:
- I need her
- I want to help her
Choose the latter to avoid a fight with the troll. You must keep going through the sewer area until you come to the gate that the objective marker has indicated. Enter the next area to see a boss fight and a cutscene. You must also deal with the enraged wizard after dealing with the Fire Elemental. To sneak up on this place, ascend the neighboring stairs and then sneakingly go around the side of the room. Avoid touching the shackles hanging from the room's walls on each side or running or jumping to avoid attracting her notice. You'll return to the bathhouse and speak with Dijkstra there after the scene plays when you and the mage reach the platform.
Payback
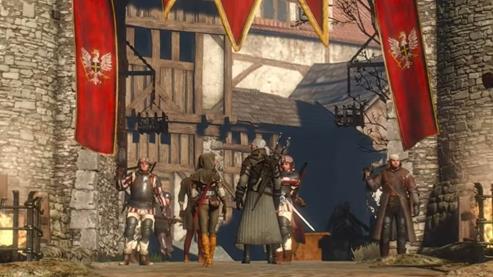
Just to the east of the St Gregory's Bridge fast travel marker, in the courtyard outside the Passiflora Brothel, is where you may find Ciri. You'll have the choice to begin the quest straight immediately or to meet Ciri somewhere else after conversing with her. Whatever decision you made during the "Get Junior" Quest will affect the outcome of this quest. If Junior is still alive, you'll run into Ciri at The Bits, where you can follow her after a little exchange. The quest goals will be updated following a short walk and a quick talk. If Junior is dead, you'll run into Ciri close to Temple Isle, where you can follow her after a lengthy talk. You'll find yourself conversing with two of *****son's thugs outside of his hiding place. This encounter will give you these choices:
- Use AXII Level 3 – You will enter without hostility
- Get outta my way or regret it – You'll need to fight until they let you in
Once inside, go upstairs to *****son's office to meet with him. We can leave after a brief discussion and our goals will be revised. You must walk with Ciri all the way to the Golden Sturgeon Tavern on the Novigrad Docks once you have finished. Once you enter the Golden Sturgeon, you'll need to converse with some thugs which include:
- Leave on your own - Thugs will leave
- Or I'll throw you out - You'll need to fight and beat the thugs
You'll eventually get to talk with an NPC, which you can leave after doing so. Ciri will lead you all the way south, across the Portside gate bridge, and to the farthest southern reaches of Novigrad, so exit the Golden Sturgeon and follow her once more. There will be another chat when you get to your destination. You get the chance to compete in a horse race with Ciri and Valdo during this talk. If you decide to compete in a race, you must follow the black racing line on the mini-map while passing through the route's illuminated checkpoints. On narrow sections of track, be sure to get out to a strong start and slow down to let your horse rest so that the opposition can't pass. One of the guys we met earlier would approach us after the race and an evening of fun and invite us to accompany him on a mission to steal some horses. A couple of choices are given for the dialogue, and we recommend choosing the "Let's steal some horses" option to extend this quest further. You'll find yourself back in control of Geralt in front of some stables if you chose to assist in stealing some horses. Reach the roof by ascending the wooden scaffold to the left of the doorway, and then proceed across the planks to a doorway. Arrive inside. A sleeping guard is to the left and several horses are below you inside the stable. This place needs to be silent, so we must move extremely carefully to avoid disturbing the horses, who will then alert the security guard. Hit the horses with an AXII sign to calm them down if you notice them becoming restless. As you descend the ladder, move slowly in the direction of the sleeping guard. The Stable Key sits on a table to his left. Open the door adjacent to the table using the Key. A cutscene will play then will eventually end the quest.
The Great Escape
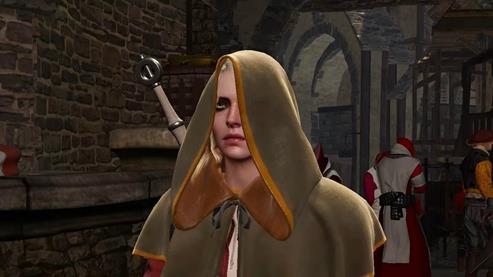
On the first floor of Crippled Kate's Tavern, Yennefer can be located in the corner to the left of the entrance. You'll learn the whereabouts of a person of interest after conversing with Yennefer, and you'll need to interview a man who knows how to find her. Unfortunately, as soon as we try to talk to him, he runs away. So, chase after him. You might use a punch or an AARD blast to quickly bring him down. In order to corner him if you are too sluggish, you will need to follow him up onto the roofs. When you've finished talking to him, try to elicit as much information as you can before letting him go. You can choose to speak with Zoltan as a side objective if you discussed the guards with Yennefer. To the Rosemary and Thyme you should go.
We must now travel to Oxenfurt and locate Yennefer. Follow her through the streets until you come to the well after having a little conversation. To reach the water pool below, dive into the well. Start using your Witcher Sense as soon as you get there. Three chests in the nearby water as well as one further down in the underwater tunnel can be seen. We'll need to loot these for a few items. Swim through this tunnel, and then climb out into some elf ruins on the other side. We are urged by the game to enter the door on the right. You'll run into a Grave Hag in the following room. These animals behave similarly to Water Hags but are stronger because they are on land. When it is defeated, turn on your Witcher Vision and scan the right wall for a lever. It transpires that the handle is absent. Use Witcher Sense to scan the wall-mounted lever next to the water-filled hallway's entrance in order to take a lever handle. Return to the damaged lever and use it to insert the replacement handle and unlock a neighboring door. Once inside, you can swim to the left through the murky channel and dive to locate a treasure and a body that can be looted. We won't be passing through the locked gate on the left when you arrive at the dead end! As a result, enter the tunnel on the other side and search for a ledge we may ascend. Kill the two Witch Hunters that are present in this chamber. A sewer key is on the table in the far right corner.
Continue on through this door and proceed up the stairs to reach the prison. Kill the three Witch Hunters who are hiding nearby by going through the door. Our goals will change as soon as all three of them are out for the count in a scene that will play. Go through the designated door and up the stairs to the following level. Kill the two Witch Hunters inside the doorway to your immediate left, then enter to loot the two chests within. Retrace your steps and enter via the entrance to the outside. As you're doing so, an alarm will go out, alerting every guard in the vicinity to your presence and causing them to move in to attack. There are a total of four Witch Hunters. Don't be scared to draw them back into the area we came from so you can focus on one at a time. Make sure to prioritize taking out the crossbowman before concentrating on the spearman and the shield guy.
Climb the stairs behind the alarm, and when you get to the top, turn right instead of left as the game would have you do to uncover the treasure chest. To locate the Warden's lodgings, proceed along the path to the next objective point. Kill him and take the Cell Key from his corpse. Depending on whether Zoltan assisted you or not, return to Margarita, killing the reinforcements that have arrived or sneaking back. The cell key should unlock all the cells when you go to the cell area; there are three other convicts here that we can release at your discretion. Open Margarita's cell when you're ready for a cutscene to continue. We'll need to break out of the jail now. Either return to the courtyard with all the Witch Hunters, climb up to the wall, and drop down at the stated position, or retrace your steps into the sewers, use the Sewer Key we discovered to unlock the grating, and exit through one of the homes.
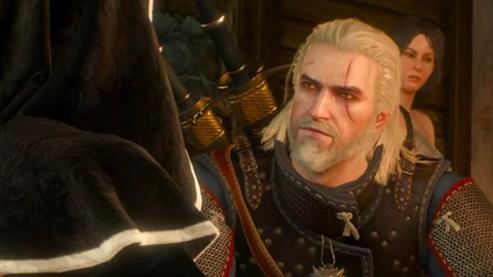
It Takes Three to Tango
After getting the quest, you must obtain some wine, which you will either already have in your inventory from looting everything or can be bought from a merchant. After getting the wine, proceed to the Kingfisher Inn. On the second story are Triss and Yennefer. For a scene, rap on the door that is marked. The quest will be finished following one more quick talk.
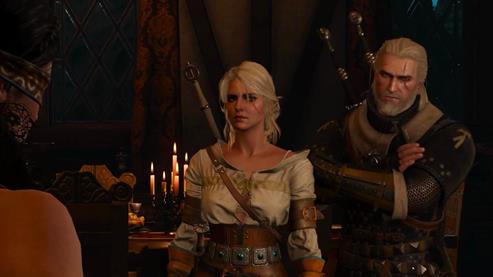
Through Time and Space
Avallac'h is located in a room on the top floor of the Rosemary and Thyme. Talk to him to find out his strategy. After a brief conversation, you'll have the option of starting the quest right immediately or scheduling a meeting with Avallac'h at a nearby goal point. Regardless of the route you choose, you'll arrive at the home we visited during the "Novigrad Dreaming" quest when you're ready to leave. Look for a weak wall near the oven in the basement where we first encountered the Godling. Use AARD to destroy this and you'll discover a live portal. For a cutscene, approach it. We'll eventually arrive in a desert planet, which will be a welcome change of pace from the game's up to this point predominant medieval theme. Simply follow Avallac'h to move on through the area, and you'll ultimately reach another portal.
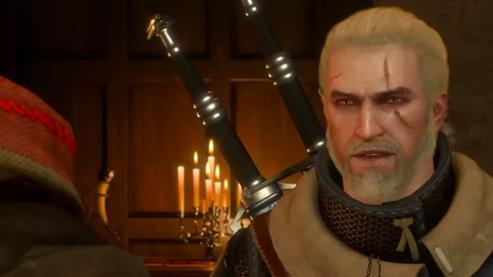
Currently, we must wait a short while before it activates, and regrettably, all of your explorations have warned Sandcrabs. We must eliminate them as they emerge; keep in mind that they will keep spawning; therefore, simply fend them off until the portal appears, at which point you must leap through it. Another planet! Drop from the cliff in front of you, then turn right along the grassy path. You'll observe a gas cloud covering a patch of red grassy plants at the bottom of the ledge. Geralt will suffocate if you remain within it for too long. Unfortunately, the only way to get past the red plants is to run through them as we go toward the portal in the distance. You can jump into the gas, run a short distance, and then climb up to a high area of land to catch your breath in order to pass safely. You can search the red cliffs in this location for lootable Crystallized Essences and Runestones. There is a Place of Power at the foot of the first big pillar on the right as you get there. Alongside this, there is a path that descends. Stop at the edge of the ledge above the red bushes as you descend the trail to the valley level. Drop down and find a secure place on the platform directly across the path. From here, turn to the left and proceed to the next safe area to the west. In the red grass farther to the west, locate the stone pillars. Behind them, in the distance, is another secure area. Hurry over here and ascend. To find the enormous ribcage in the red grass, climb to the very top of this safe region. The next safe location is at the far end of this, so run there. You must pass through this tunnel in order to utilize AARD to destroy the ice wall preventing you from leaving. Before you leave the cave's relative protection, be aware that once you're outside, the cold will quickly deplete Geralt's health. You'll be able to observe ruins, hills, and other spots where there is dark ground, all of which can be utilised, as we must run from shelter to shelter to stop this from happening. You can descend and sprint to the dark cliff straight in front of you from the cave entrance. Turn to the right and look behind a hill to discover another area devoid of snow. Hurry to do this. Follow this all the way to the right, then turn around and sprint for the ruin with the stairway off to the east. At the top of the steps, look for a wall that is slightly to the east and would obstruct your path if you went any farther. In order to discover a slope that Geralt can slide down, run up to this and follow it to the left. A brief scene will be shown. When you regain composure, go into the building Geralt is in. To fully restore health, ascend to the second floor and start the fire there. Before going back downstairs, loot the place. As you leave the structure, hop down the ledge in front of you to the slope below. To enter the sizable building on the left, continue down this path all the way to the foot of the hill. Two Hounds of the Wild Hunt will attack you if you descend to this area's bottom level. Once the adversaries are dead, search the area for a campfire. Before continue, ignite this to regain your health once more. After leaving the barn, descend the hill a little further, and look left for a gap in a triangular-shaped roof. Enter this room, descend to the ground floor, and light the stove to restore your health. Utilizing the different cover options you come across, continue moving down the slope until you reach what appears to be a tower at the corner of an exterior wall of a castle. See whether there are any stairs leading up to this. You can see the lighthouse we're trying to get to in the distance if you go through and look for a gap in the wall to the left. Lie down, then sprint to the braziers. If they aren't ignited, fire an IGNI shot at them to get them going, then keep near by to help them get well. A pack of Hounds of the Wild Hunt will attack you not long after you get at the braziers. Put an end to them all. Use the braziers to replenish your health to 100%, then sprint to the lighthouse one last time. Climb down the stairs and enter the doorway to start a discussion.
Avallac'h will open a new portal following your talk. proceed with caution. Once you reach the objective point and a scenario starts to play, continue with your companion across this new location. You'll find yourself back in Novigrad after a talk and a few scenes, at which point the mission will be finished.
Battle Preparations
We must proceed to the designated ship in the Novigrad Docks to start this task. For a scene and a dialogue with Yennefer, approach it. Then, to continue, board the ship and speak with Avellac'h. A cutscene will play out and will open up a pair of new quests:
While progressing, another pair will open up:
We might as well visit Crach nearby as he is the closest marker. The quest for "The Sunstone" will begin as a result.
The Sunstone, Child of the Elder Blood, and Veni Vidi Vigo are the three main underlying missions. Once you have finished them, you can travel to Kaer Trolde Harbour and speak with Avellac'h to turn in the task. After the talk, you are offered the choice of starting the next mission, "On Thin Ice," immediately away or waiting until you are ready to start before meeting Avallac'h and the rest of your crew on Undvik.
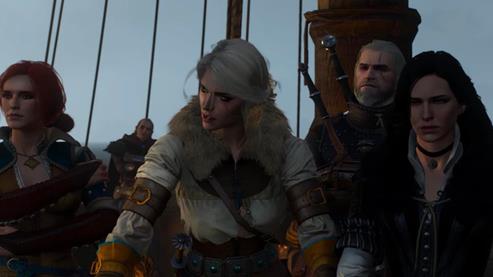
The Sunstone
If you recently arrived in Skellige through the "Battle Preparations" quest, you can meet Crach on the observation platform close to where the ship has parked in the Kaer Trolde harbor. Ermion's whereabouts will become known after speaking with him. Depending on who has been chosen as the monarch of Skellige, Ermion's location may change. Cerys or Hjalmar will probably be the ruler if you successfully completed the side quests "Possession," "The Lord of Undvik," and "Coronation." Svanrige Bran might be the ruler if you chose not to perform them. Fortunately, Ermion will be in the Kaer Trolde stronghold close by if Svanrige Bran rules the Skellige Isles. Retrace your steps up to the keep, where you'll be greeted by a brief scene or discussion. As soon as you regain control, enter the feasting hall once more and move closer to the objective marker to find Ermion and numerous other important characters. After the action is over, a brief conflict will begin. You must kill the roughly 10 to 12 hostile soldiers who are present in the hallway with you. The good news is that you have a lot of teammates in this battle, so you can mostly delegate all the labor-intensive and tank-related tasks to them. You can talk to Ermion once another cutscene plays after you defeat the monsters.
Ermion will be housed in the keep at Kaer Muire, which is situated in the south-western peninsula of the main island of Ard Skellige, if either of the a Craite offspring has now been crowned king or queen of Skellige. It will be a lengthy trek if you don't already have a fast travel point, but at least you'll find some new fast travel markers along the route! Once you arrive in Kaer Muire, make your way into the keep and follow the path to the objective marker. Approach the objective marker at the far end of the keep to spot Ermion and several other people of interest engaged in vigorous debate. You'll be thrust into an unwinnable conversation. Whatever you say, someone will try to attack you. You must kill the approximately 5–6 enemy soldiers who are present in the vicinity. The good news is that Ermion will be present and will be able to help you during this battle by using his druid magic. Ermion will flee once the initial enemies have been eliminated. In order to reach the settlement below, we must now pursue him into the keep and kill any enemy fighters that appear. You can eventually talk to him if you leave the settlement and move a short distance down the road.
The information Ermion provides to you is roughly the same regardless of where you find him; he will tell you the names of two people who you must track down and speak with. You just need to visit one of them in order to move forward because both can provide you with the necessary information. The first one, Eyvind, can be found on a vantage point with a view of the water just west of Arinbjorn. Southwest of Kaer Trolde and northwest of Kaer Muire is where you'll find Arinbjorn along the coast. A pair of timed dialogues will be presented to you after speaking with him. Both have different consequences:
- Say Nothing
- Eyvind
The second timed choice, however, will influence whether or not Eyvind will provide you with the information you need, whilst the first choice does nothing more than slightly alter. Choices include:
- For a treatise on the Aen Sedhe - no information will be gained but you'll need to meet the Pearl Divers
- Gathering material for an adventure novel - Information will be retrieved
They are on the island peninsula directly west of Kaer Trolde and north of Arinbjorn if you were unable to receive the information from Evynd or if you chose to go after the pearl divers right away. Speaking with them will yield the knowledge, but be ready to engage in combat because Drowners will cut you off in the middle of your conversation. We need to return to Kaer Trolde Harbour so that we may talk to Yennefer now that we have the knowledge in order to move on.
An objective marker for the location of the elven ruins containing the Sunstone has been added to your map after you previously discovered the sunstone's location and spoke with Yennefer and the other sorceresses at Kaer Trolde Harbour. It is situated along the northern coast of Ard Skellige Island, just to the north of Kaer Trolde. We'll need to rent a boat from the harbor and sail up to the site in order to get there. Sailing north, under the bridge leading to Kaer Trolde keep, and via this gorge is the quickest way to reach there. As soon as you enter open water, hug the right-hand coastline until you reach the goal point. Exit the boat when you reach the Elven ruins, and then talk to Philippa there. She will dispel an illusion nearby and make a way inside the ruinous area. If you want some goods, be sure to raid the chest where she was standing. Enter the ruins, and then follow Philippa through them until you get to a siren-filled room. As soon as you enter, a group of Drowners will join the Siren in attacking you. The Siren is the main goal, and until you destroy her, waves of three to four Drowners will keep appearing. Use your AARD or crossbow to temporarily knock the Siren out of the sky so you can kill it. After the battle, investigate the area to the right of the entrance to locate a Place of Power (boosts IGNI) to draw from. Go back to Philippa and continue to follow her. Follow her up the stairs once she has rebuilt them. She will turn right at this point, but you are free to investigate the left-hand path to get to a sizable room with a venomous arhasae inside of it (think giant spider). Kill it and take the three chests here for some god-quality loots: two next to the spider, and one tucked under the lip of the platform opposite the entrance door. From the end of the paved part, there is a small chamber in this region as well. A marker for a hidden treasure can be found here. To find a Key, activate Witcher Sense and look over this body. You can see a chest on the opposite side of the room, but if you glance down, you'll realize that the floor is covered in tiles that are spike traps; walk on one of them, and you're dead! There is a safe passageway across the floor, and to find it, you may either use IGNI or AARD to set off the traps and check where no spikes appear, or you can utilize Witcher sense and pay close attention to the tile holes. Pull the lever on the wall after looting the chest at the far end to remove the spike traps, which will make it much simpler to return. Go back to the previous chamber and find Philippa there. Immediately after entering the next enormous tunnel, turn to your right to watch another Golem spring to life. This creature is essentially an upgraded version of the boss we fought alongside Keira earlier in the "Wandering in the Dark" quest. This time, you have Philippa with you, who can use her magic to paralyze and harm it, and you can use the same general strategies to deal with it quickly. There is a chest inside the entryway that the Golem was guarding. Follow Philippa until she enters a door that will start a scene. This will be followed by a brief detour before you arrive at a chamber covered in mirrors.
Head into the water when you enter to find two chests immediately to the left of the bridge in front. Return to the door and proceed to the left while keeping an eye on the center of the room. To get to the platform with the first mirror, climb up the ledge. Grab some treasures from this chest, then pull the lever on the mirror's back to turn it on. Once more at the entrance, turn to your right and search for a flight of stairs heading up into a different hallway. Destroy the stalactites and stalagmites in the alcove on the right of the corridor as you move through it to gain access to a chest. When you reach the next flight of steps, fight the Ghost that appears by continuing along the hallway. You will be on the platform with the second mirror when you reach the top. Grab some treasures from this chest, then pull the lever on the mirror's back to turn it on. Return to the entrance to the room, then cross the bridge to the central platform. From the platform, go right and then turn left to find a slope that leads up to the last mirror. Before turning on this mirror, climb up here and defeat the second Ghost on this ledge. Your goals will change as a cutscene is played. Make your way over to the platform and talk to Philippa there. The mission will come to an end as a result. You have two options for leaving the area which is to turn around and go back the way we came till you are outside, or go through the door on the platform where we picked up the Sunstone. If you select the latter, you can move through the territory in a straight line while occasionally eliminating Ghosts. When you arrive to the region of the collapsed bridge, search the water beneath the bridge segments for two chests. Turn the corner at the top of the first destroyed bridge to find another opening in the road. Drop to the ground and scan the area to your left for another chest. As you approach the stairs, kill the Ghost there before continuing on your journey. You can enter the door on the left at the top of the steps. Kill the two Ghosts in this area to receive a pair of chests as payment. Return to the staircase's top and enter via the door on the opposite side. Follow this cave and scale multiple ledges until you reach a somewhat wide place where we must descend. Another Ghost will set you up here. When it is safe to do so, defend yourself and look to your right, where we descended, to locate a small platform with four chests. We can now leave the ruins by ascending the nearby steps to the surface. To unlock a fast travel marker that will help you get to your next destination more quickly, head over to the adjacent village of Rogne in the southwest. Veni Vidi Vigo is the last task we need to do in order to fulfill the "Battle Preparations" umbrella quest, so let's get started!
Child of the Elder Blood
Once you have found the Sunstone's location, this quest will begin immediately when you speak to Yennefer in Kaer Trolde Harbour. You will learn about a mystical research facility that the sorceresses want you to visit during this talk. You'll begin the quest "Child of the Elder Blood" after the conclusion of the chat. A brand-new rapid travel signpost will also be given to you on your map. On a little island around midway between the main Skellige islands of Undvik and Spikeroog is the Pali Gap Coast. The laboratory can be found here. travel quickly there to begin. Speak with Yennefer and Ciri inside the elven ruins beside the quick travel point by entering the doorway. After the sequence, you'll need to defeat a Golem, who is effectively a leveled-up version of the boss Keira and I faced earlier in the "Wandering in the Dark" quest. You have two pals this time, so you can deal with it quickly by employing the same broad strategies. The Golem will fall, and a doorway will then open. Go inside with the others. Before examining the rest of the space, we might check Yennefer's workstation for a comical scene. While exploring the initial area, using your Witcher Sense, you can examine the following:
- Sweets
- Hair brush
It's a good idea to take a look at his notes as you proceed along the winding hallway until you come to another sizable space for a conversation. Following the scenario, your goals will change. In the new search area, go to where Yennefer is waiting by a door and activate your Witcher Sense there. You can explore the region out of interest. You can look at:
- Perfume Bottle
- Mirror
When you are prepared to move forward, enter the door to view a cutscene. You will be given a timed decision during the chat where you can make decisions that will slightly affect your odds of either a happy ending or a negative one. These are:
- Calm Down - Supports bad ending
- Go for it - Supports good ending
We'll wrap this up after the scene. Retrace your steps through the cave to emerge outside, where Ciri will ask you to make one more quick decision that, like the previous one, could change the course of the story or lead to a new mission. These are:
- Yeah, I'll go with you - Supports Good Ending
- No time - Supports Bad Ending
The task will be finished as soon as the dialogue is over. At the conclusion of the talk, you are offered the option to immediately begin the "Skjall's Grave" quest or to see Ciri on Hindarsfjal later.
Skjalls Grave
After completing the "Child of the Elder Blood" quest, you have the option of seeing Ciri on Hindarsfjal or immediately beginning the "Skjall's Grave" quest. In either case, a scenario will start to play after you get there and meet Ciri. The entire quest will be covered by this scene and the talks that follow; there is actually no gameplay at all. Even if it doesn't seem to have any effects, there is a timed decision that can be made. Options are:
- Quiet Down
- Your Laws don't bind us
You are offered the choice to stay here or be ported back to Kaer Trolde Harbour at the conclusion of the task. You have a choice! This quick quest can be finished in either direction that you select.
Veni Vidi Vigo
In this straightforward task, our goal is to sneak onto the Emperor's ship without being seen. Off the shore of Undvik, the Emperor has gone and moored his fleet. If you've been here previously, you can quickly drive to Marlin Coast or Gull Point to get up close and personal. We need to swim out to the fleet once we are close enough to see the ship that is indicated by the yellow search area. The searchlights must be avoided at all costs. Additionally, being on the surface will allow you to see where the searchlights are reflecting off the water, saving you from any unnecessary frustration. Here, you'll need to swim between ships, dodging searchlights along the way, and locating the objective sign. You'll hear the guards recognize you and disengage when you get close to the right vessel. To end the mission, swim to the front of the ship and engage with the anchor there.
On Thin Ice
You must travel to Undvik and meet your comrades at the objective marker when you are prepared to finish the remaining quests in the main plot. You'll learn that time is running out and you have one final chance to make your preparations after a talk explaining the overall plan of attack for the upcoming quest and another one regarding Ciri. Once more, Avallac'h will give you the choice of joining him soon or starting right now. We'll have a few of hard fights to deal with soon, so I'd suggest getting ready beforehand! Use this blacksmith to fix your equipment, and to make life a little bit simpler, lubricate your blades with Elementa Oil and Hanged Man's Venom.
Here are sidequests that will automatically fail if you haven't completed them at this quest:
When you're ready to begin the last act, go over and talk to Avallac'h. You'll finally get to see some action as Ciri after several cutscenes. In essence, we'll be put within a huge iceberg with a predetermined path through it. At this moment, it looks that Ciri has significantly increased her power, as her attacks now have a much greater ability to deal damage. Lots and lots of Wild Hunt Warriors and Hounds of the Wild Hunt will be encountered as you move along the path. Even while you can fight them, it will eventually be a losing struggle because they will keep spawning into the region. Instead, focus on eliminating any foes that stand in your path while rolling or blinking as often as possible to get to the next objective markers. You will descend to a sizable circular platform below at the path's end to face a boss. A cutscene will play after a few blows from Ciri to advance the fight to the next stage. A cutscene will start playing after the boss has sustained enough damage. When you regain control, you'll find yourself submerged. To immediately swim to the surface, keep holding down the button. Another scene will begin to play as you arrive at your destination. We'll return to dry land at this point. Drop down and follow the way around to the right. Run up and close the portal with YRDEN right away. To board a ship, ascend the ramp to the right. There are numerous Hounds and Wild Hunt Warriors in the path moving forward. Fortunately, from objective marker to objective marker here, you may literally roll or sprint through the adversaries until you reach another scene. This will usher in a new boss battle with Eredin. Once he has lost the majority of his health, keep attacking him wherever you can, and ultimately he will depart through a portal. Take after him. Strike once more to bring the conflict to a close with a cutscene. We will now be immediately transferred into the following quest, "Tedd Deireadh, The Final Age."
Tedd Deireadh, The Final Age
The initial portion of this quest is a follow-the-leader type scenario where you, as Geralt, must follow Yennefer as she directs you to your objective. It begins just after you finish the "On Thin Ice" quest. You will move towards a boat that is being built from the beginning area by passing through a gate and climbing a hill. Fireballs will begin to fall from the sky as you get closer to the boat. We follow Yennefer, and you'll want to try your best to avoid these, keeping an eye out for and avoiding the orange light that forms on the ground just before impact, as they can do some real harm. You'll see a pair of horses not long after you pass the boat. Climb aboard and follow Yennefer further. You should stay close to her during this portion and ignore anything else that is happening because in addition to the fireballs, there will also be portals emerging with Cyclopses flowing through, and both of these dangers can swiftly kill you. Yennefer will dismount after a brief ride, and you will also need to do so. Once more, follow her up the nearby ledge and linger there for a while. Yennefer will maintain a bubble shield during the next sequence. You are being shielded from the ice forces that are causing havoc outside of the bubble, and up until the end of the segment, if Geralt ventures outside the bubble, he will suffer damage. You must follow Yennefer as she moves along a predetermined course in this area. You'll come across a number of portals along the way that will release Hounds of the Wild Hunt, which we must kill in order to progress forward. To avoid harming Geralt unnecessarily, let them approach you and kill them inside or just outside the bubble. Another scene will eventually play, and then you'll be inside the mystical barrier. Ascend this path to the top of the tower. Here, you will have another another timed choice. These are:
- Not falling for that.
- Think I'll spare you?
You'll have one more quick talk before you have to make a last timed decision. You'll be able to see the results of your labors and the satisfying conclusion after a few more cutscenes in the quick epilogue quest "Something Ends, Something Begins"!

Something Ends, Something Begins
The "Tedd Deireadh, The Final Age" quest begins immediately after completion, and based on your decisions up to this point, you'll get one of three primary endings. A brief, joyful, carefree quest plays out the three endings and their results. The mechanisms for the endings are as follows:
Ending A (Good)
- Choose the dialogue "Go For It, Yeah I'll go with you." to Ciri during Battle Preparations.
- Choose the dialogue "Think I know what might lift your spirits." when comforting Ciri during Blood on the Battlefield, and DO NOT visit the Emperor.
- Choose the dialogue "You'll do fine on your own." to encourage Ciri to speak to the Lodge of Sorceresses by herself during Final Preparations.
- Choose the dialogue "Go for it." when Ciri loses her temper during Child of the Elder Blood.
- Choose the dialogue "Yeah, I'll go with you." when Ciri asks to visit Skjall's grave during Child of the Elder Blood.
For this ending, it is important that you've made more positive choices in your playthrough in relation to Ciri, and that you did not go see the Emperor during the Blood on the Battlefield.
In this ending, Ciri survives her encounter with the White Frost. Geralt then visits Emhyr Var Emreis and tells him that Ciri sacrificed herself during the last battle in order to save the world and prevent the White Frost from consuming the land. He then travels to the former garrison outpost in White Orchard where he receives special silver sword crafted by a hired blacksmith. Then Geralt makes his way back to the White Orchard Inn, where he meets Ciri again and gives her the sword, indicating that Ciri is now a full-fledged Witcher, and is now ready to begin her life of adventure.
Ending B (Good)
- Choose the dialogue "Go For Iti, Yeah I'll go with you." to Ciri during Battle Preparations.
- Choose the dialogue "Think I know what might lift your spirits." when comforting Ciri during Blood on the Battlefield, and go see the Emperor, but deny the money.
- Ensure Nilfgaard emerges victorious during the war by completing the Secondary Quests An Eye for an Eye, A Deadly Plot, and Redania's Most Wanted in Act II.
- In Act III, during the Main Quest Blindingly Obvious, you would need to be pleasant to Dijsktra and feed him information regarding Ciri. This will then unlock the Secondary Quest, Reason of State. Complete Reason of State and side with Vernon Roche and Ves against Dijsktra.
- Choose the dialogue "You'll do fine on your own." to encourage Ciri to speak to the Lodge of Sorceresses by herself during Final Preparations.
- Choose the dialogue "Go for it." when Ciri loses her temper during Child of the Elder Blood.
- Choose the dialogue "Yeah, I'll go with you." when Ciri asks to visit Skjall's grave during Child of the Elder Blood.
For this ending, you need to have made more positive choices in your playthrough in relation to Ciri. It is important that during Blood on the Battlefield, you go and see the Emperor, he will then attempt to pay you for bringing Ciri to him. You have to choose to refuse the payment in order for Ciri to be proud of you and result in a positive ending.
In this ending, Ciri survives her encounter with the White Frost. Once you've met up with Ciri again, the two of you will begin a series of brief but important father-daughter activities, as well as some light conversations. Once the two of you have returned to the inn, a group of Nilfgaardian soldiers are waiting to escort Ciri back to the palace. Ciri then tells you that she previously spoke to her father and that she realized that she could only change the world for the better by taking the throne of Nilfguard. The two of you part ways after saying farewell in tears, knowing that you will cross paths again.
Ending C (Bad)
- Choose the dialogue "Calm Down, No Time." to Ciri during Battle Preparations.
- Choose the dialogue "Relax. You don't have to be good at everything." when comforting Ciri during Blood on the Battlefield, and go see the Emperor, and also accept the money.
- Choose the dialogue "Going with you." to accompany Ciri to the meeting with the Lodge of Sorceresses during Final Preparations.
- Choose the dialogue "Calm down." when Ciri starts to lose her temper during Child of the Elder Blood.
- Choose the dialogue "No time." when Ciri asks to visit Skjall's grave a the end of Child of the Elder Blood.
For this ending, you would need to make negative choices throughout your playthrough in relation to Ciri. It is important that during Blood on the Battlefield, you go and see the Emperor, he will then attempt to pay you for bringing Ciri to him. You have to choose to accept the payment this time by selecting the dialogue "Definitely need it more than you." Ciri will then begin to doubt herself before she sets out to battle the White Frost.
In this ending, Ciri dies. A week after the events, Geralt returns to Crookback Bog to hunt down the Crone Weavess who had stolen Ciri's witcher medallion. Geralt defeats Weavess along with her allies, though Geralt eventually breaks down in grief upon retrieving the medallion. It'll then show Geralt sitting alone, remembering her. As the camera zooms out, dozens of monsters can be seen slowly swarming the area, leaving Geralt's fate unknown after the scene ends.
 Anonymous
 Anonymous
You guys should have a quest progression. Like what side quests are recommended at what point of the main storyline. This page is woefully unhelpful as of now.

 Anonymous
https://docs.google.com/document/d/1qI0jctLVP1DRzMiTY0md7uRbTmYv-S7W8Tg_MXOde_o/edit?usp=sharing Its a work in progress at the moment, but here!

 Anonymous

Any portugues pages?
0
+11
-1